Quick answer
Use a boiling-water canner only for acid foods like fruit, pickles and tomatoes with added acid. Vegetables, meat and other low-acid foods need a pressure canner. Follow tested USDA recipes only, adjust for your elevation, and never can in an oven.
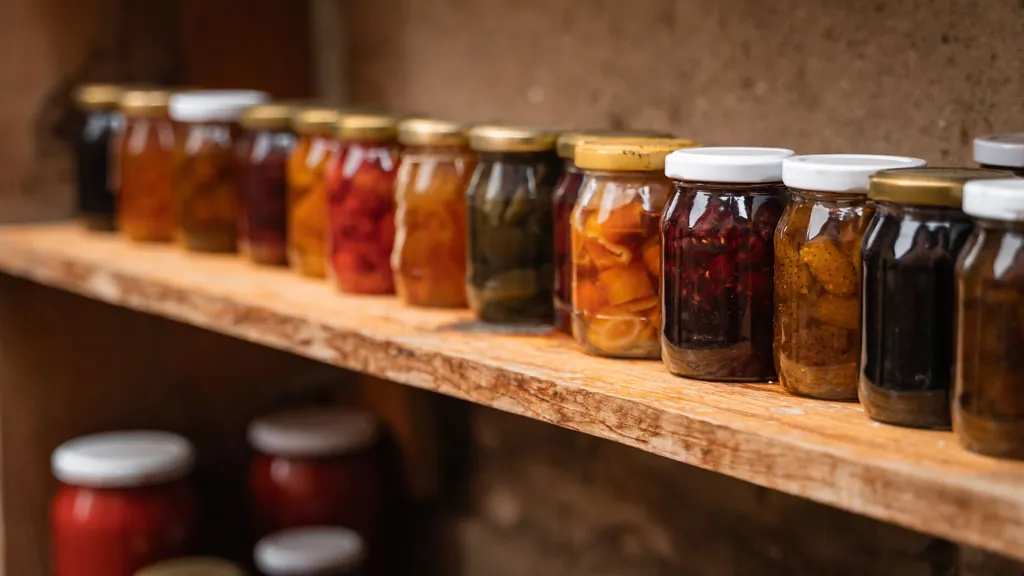
This chapter covers the garden, canning, the older ways to keep food, and the animals that feed an Amish homestead. Canning is the one place where small mistakes can make people very sick, so follow tested recipes only. For canning questions, and for your elevation, ask your county extension office.[1] For wiring and generator questions, ask a licensed electrician.
The Amish garden
An Amish family garden is often large, plus field corn, potatoes, and an orchard. Start smaller in year one, because weeding, not land, is usually the limit. Your county extension office can tell you how much to plant for your family and your climate.
What to plant, and how it keeps
| Crop | Stored as |
|---|---|
| Potatoes | Root cellar (see Guide 3) |
| Tomatoes | Canned with added acid, using a tested recipe |
| Green beans | Pressure canned only |
| Sweet corn | Pressure canned, or dried |
| Cabbage | Sauerkraut, root cellar |
| Onions and garlic | Braided and hung in a cool, dry room |
| Carrots and beets | Root cellar, or pickled beets from a tested recipe |
| Winter squash and pumpkins | Cool, dry shelf |
| Dry beans | Fully dried, in sealed jars in a cool, dry, dark place |
| Cucumbers | Pickles from a tested recipe |
| Peas | Pressure canned, or dried |
| Greens (lettuce, spinach, kale) | Eaten fresh. Sow short rows every few weeks |
Layout tips. Plant in long rows wide enough for a wheel hoe or horse cultivator. Rotate plant families each year so pests and diseases do not build up. Put perennials (asparagus, rhubarb, strawberries, berries) along one edge.
Soil. Amish soil fertility comes from manure. Spread well-composted manure in the fall, and rotate the field crops with clover or alfalfa, which add nitrogen.
Orchard. Plant apples, pears, peaches, and cherries, plus grapes and berries. Fruit trees take several years to bear well, so plant them early.
Seed saving. Grow open-pollinated or heirloom varieties, so the seed you save grows true. Beans, peas, tomatoes, and lettuce are the easiest to start with. Squash cross-pollinates, so saved squash seed may not grow true. Store seed in labeled envelopes in a cool, dry, dark jar.
Canning safely
An Amish household may put up hundreds of jars a year. The single most important rule: the food decides the canner. Low-acid foods must go in a pressure canner.[2] Getting this wrong risks botulism, a deadly form of food poisoning.[1] Spoiled low-acid food may show very little sign that anything is wrong.[3]
| Method | Use it for | Why |
|---|---|---|
| Boiling-water canner | Acid foods: fruits, jams and jellies, fruit butters, pickles, sauerkraut, and tomatoes with added acid | Acid foods have a pH of 4.6 or lower, which blocks botulism growth[1] |
| Pressure canner | Low-acid foods: all fresh vegetables except most tomatoes, red meats, poultry, seafood, milk, soups and dry beans | Low-acid foods need 240 to 250 F, which only a pressure canner reaches[1] |
Never do these. Do not can in an oven, a microwave or a dishwasher, and do not use open-kettle canning (filling hot jars and skipping the canner). Canning powders do not replace a canner.[4] Never make up your own recipe, time or pressure. Use only tested recipes from the USDA Complete Guide to Home Canning, which the National Center for Home Food Preservation publishes online.[1]
Boiling-water steps
- Use jars and lids made for home canning, and follow the lid maker's directions.
- Pack the food, leaving the headspace your tested recipe gives.
- For tomatoes, add bottled lemon juice: 1 tablespoon per pint or 2 tablespoons per quart. Never leave the acid out.[5]
- Remove air bubbles, wipe the rims, and put on the lids and bands.
- Lower the jars into the canner. The water must be at least 1 inch over the jar tops, or 2 inches if the time is over 30 minutes.[2]
- Start timing once the water boils hard. If it stops boiling, bring it back to a full boil and start the time over.[2]
- Turn off the heat, wait 5 minutes, then lift the jars out. Let them cool undisturbed for 12 to 24 hours.[2]
Pressure-canning steps
- Put the rack and the amount of hot water your canner's directions give into the canner. Load the jars.
- Lock the lid and let steam flow from the open vent for a full 10 minutes before you put on the weight or close the petcock.[2]
- Bring it to the pressure your tested recipe gives for your elevation. At 0 to 1,000 feet that is usually 10 pounds on a weighted gauge, or 11 pounds on a dial gauge up to 2,000 feet. Higher up, you need more pressure.[6][2]
- Start timing once it reaches pressure. If the pressure drops below the target, bring it back up and start the time over from the beginning.[2]
- When time is up, turn off the heat and let the canner cool on its own until the pressure is gone. Never force-cool it. Then wait 10 minutes before you open the lid.[2]
Have a dial gauge checked for accuracy every year. Many county extension offices can test it.[2]
Examples of tested pressure times (0 to 1,000 feet, 10 pounds weighted gauge)
| Food | Pints | Quarts |
|---|---|---|
| Green beans, pieces | 20 min[6] | 25 min |
| Sweet corn, whole kernel | 55 min[7] | 85 min |
| Carrots, sliced or diced | 25 min[8] | 30 min |
| Meat (beef, pork, venison), strips, cubes or chunks | 75 min[9] | 90 min |
| Chicken, without bones | 75 min[10] | 90 min |
These times are only examples. Each tested recipe also tells you how to prepare the food, the headspace, and the pressure for higher elevations. Water boils at a lower temperature as you go up, so above 1,000 feet you need a longer time in a boiling-water canner or more pressure in a pressure canner.[11] There is no safe way to can green beans in a boiling-water canner.[6]
Storage. Remove the bands, label each jar with the contents and date, and store the jars in a clean, cool, dark, dry place. For best quality, keep them between 50 and 70 F, and can no more than you will use in about a year.[12] Never store jars above 95 F.[1]
Spoiled jars. Do not taste food from a jar with an unsealed or bulging lid, spurting liquid, mold, or an odd color or smell. Treat any suspect jar of low-acid food as if it holds botulism toxin, and follow the National Center's steps for handling it safely.[3]
Drying, fermenting, smoking, and curing
These methods preserve food with no canner and no cold storage. Most are older than canning.
| Method | Foods | How | Keeps |
|---|---|---|---|
| Drying | Apples ("schnitz"), beans, peppers, herbs, corn | Slice thin. Dry on screens with good airflow, in a dehydrator, or in an oven set to 140 F, until leathery (fruit) or brittle (vegetables)[13][14] | Fruit about 1 year at 60 F, 6 months at 80 F. Vegetables about half as long[14] |
| Jerky | Lean beef or venison | Slice thin and heat the meat to 160 F inside, before or after drying. Freeze pork or wild game first to kill parasites, as the tested recipe says[13] | About 2 weeks sealed at room temperature. Longer in the fridge or freezer[13] |
| Fermenting | Sauerkraut, fermented pickles | For kraut, mix 3 tablespoons of canning salt per 5 pounds of shredded cabbage. Keep it under the brine, weighted, at 70 to 75 F for about 3 to 4 weeks, or 60 to 65 F for 5 to 6 weeks[15] | Several months tightly covered in the fridge, or can it[15] |
| Curing and smoking | Hams, bacon, sausage | Follow a tested university extension guide for the cure, the time and the smoking step[16] | As the guide says |
| Lard | Pork fat | Cut fat into cubes and melt it slowly. Strain and pour into clean crocks or jars | Store cool and covered |
| Root storage | Potatoes, roots, cabbage, apples | See the root cellar section of Guide 3 | Depends on the crop |
Curing salt. Use a commercial curing salt only in the amount your tested recipe and the label give, and measure it exactly. Curing is not a place to guess, so work from an extension guide.[16]
Pennsylvania Dutch staples to learn. Apple butter, chow-chow (mixed pickled vegetables), dried schnitz for pies, scrapple from pork scraps and cornmeal, and pickled red beet eggs. Make any of them for the shelf only from a tested recipe.
Meat, milk, and eggs
A typical Amish homestead keeps laying hens, a family cow or goats, a hog or two, and sometimes a steer or meat chickens. Animals turn kitchen scraps, pasture, and garden waste into food and manure.
| Animal | Gives | Daily care |
|---|---|---|
| Laying hens | Eggs most of the year | Feed, water, collect eggs, lock up at night |
| Meat chickens | Meat within a few months | Feed, water, clean bedding |
| Dairy goats | Milk. Keep at least two, because goats need company | Milk twice a day |
| Family milk cow | Milk, cream and butter | Milk twice a day, every day. Needs pasture and winter hay |
| Hogs | Pork and lard by fall | Feed, water, clean pen |
| Beef steer | Beef after about two years | Water, pasture rotation, winter hay |
Your county extension office and a large-animal vet can tell you how much space, feed and hay each animal needs where you live.
Milk. Milk into a clean stainless pail, strain it, and chill it fast. Keep it at 40 F or below.[17] Raw milk can carry harmful bacteria such as Listeria, Salmonella and E. coli. It is a risk for everyone, and most of all for children, pregnant women, older adults and anyone with a weak immune system. Pasteurization kills those bacteria.[18] Skim the cream for butter, made in a hand-crank or dash churn.
Butchering. Amish families butcher in late fall, when cold weather helps the meat chill. Chill it quickly and keep it at 40 F or below.[13] It is a shared day: several families gather to help and divide the work. Learn hands-on from an experienced neighbor before you try it alone.
Hunting. Deer season provides meat for many rural families. Chill the carcass quickly.[13] Venison cans well with the tested meat process above.[9]
The food year and the pantry
The Amish year runs on the seasons. Shift the months below to fit your own frost dates, which your county extension office can give you.
| Season | Garden and field | Kitchen and preserving | Animals |
|---|---|---|---|
| Jan to Feb | Order seed, plan beds, sharpen tools | Cook from the cellar and jars. Mend clothes and quilt | Cut ice. Feed hay. Lambing or kidding |
| Mar to Apr | Start tomatoes and peppers indoors. Plant peas, onions, potatoes, cabbage | Last of the stored roots. Make maple syrup | Buy chicks and feeder pigs. Spread manure |
| May to Jun | Plant corn, beans, squash, cucumbers. Hoe weekly | Strawberry jam, rhubarb, early greens | Animals go to pasture. First hay |
| Jul to Aug | Harvest peak. Hoe and water | The canning rush: beans, corn, tomatoes, pickles, peaches | Second hay. Wheat and oats harvest |
| Sep to Oct | Dig potatoes. Harvest squash, apples, dry beans | Apple butter, applesauce, sauerkraut. Fill the root cellar | Field corn harvest. Breed animals |
| Nov to Dec | Spread manure and plant cover crops | Butchering: can, cure, smoke, and render lard | Bring animals in. Split next year's wood |
What a full pantry holds. A year-round Amish pantry is built from the list below. How much you need depends on your family, so start with a few weeks of what you already eat and grow it a little at a time.
- Wheat or flour, cornmeal, oats and rice
- Dry beans and peas
- Sugar and honey (never give honey to a baby under 1 year old)[19]
- Lard or oil, and salt for cooking and preserving
- Home-canned vegetables, fruit and meat, from tested recipes
- Potatoes and root crops in the cellar
The modern backup
Most of us will not put up hundreds of jars, and that is fine. The modern version is a fridge and freezer you watch closely in an outage, a shelf of store-bought canned food you rotate, and a way to cook outdoors. Keep an appliance thermometer in the fridge and freezer so you know the food stayed at 40 F or below and 0 F.[17]
For canning questions and gauge testing, call your county extension office.[2] For wiring and generator hookups, call a licensed electrician.
- Food safety in a power outage: what to keep and what to toss when the fridge goes warm.
- What to do when the power goes out: food, water and safe generator use for the first three days.
- Winter storm checklist: the pantry and supplies to have before the storm.
Common questions
Can I can vegetables in a water bath?
No. Vegetables other than most tomatoes are low-acid foods and must be processed in a pressure canner.[2] There is no safe way to can green beans in a boiling-water canner.[6] Tomatoes need added acid to be water-bath canned.[5]
Is oven canning safe?
No. Processing jars in an oven, a microwave or a dishwasher, and open-kettle canning, are not recommended because they do not prevent all risks of spoilage.[4]
Sources
- Ensuring Safe Canned Foods National Center for Home Food Preservation (University of Georgia), accessed November 14, 2026
- How to Use Boiling Water and Pressure Canners National Center for Home Food Preservation (University of Georgia), accessed November 14, 2026
- Identifying and Handling Spoiled Canned Food National Center for Home Food Preservation (University of Georgia), accessed November 14, 2026
- Equipment and Methods Not Recommended National Center for Home Food Preservation (University of Georgia), accessed November 14, 2026
- Tomato acidification directions National Center for Home Food Preservation (University of Georgia), accessed November 14, 2026
- Beans, Snap and Italian, Pieces, Green and Wax National Center for Home Food Preservation (University of Georgia), accessed November 14, 2026
- Corn, Whole Kernel National Center for Home Food Preservation (University of Georgia), accessed November 14, 2026
- Carrots, Sliced or Diced National Center for Home Food Preservation (University of Georgia), accessed November 14, 2026
- Meat, Strips, Cubes or Chunks National Center for Home Food Preservation (University of Georgia), accessed November 14, 2026
- Chicken or Rabbit National Center for Home Food Preservation (University of Georgia), accessed November 14, 2026
- Selecting the Correct Processing Time National Center for Home Food Preservation (University of Georgia), accessed November 14, 2026
- Storing Home Canned Foods National Center for Home Food Preservation (University of Georgia), accessed November 14, 2026
- Jerky National Center for Home Food Preservation (University of Georgia), accessed November 14, 2026
- Packaging and Storing Dried Foods National Center for Home Food Preservation (University of Georgia), accessed November 14, 2026
- Sauerkraut National Center for Home Food Preservation (University of Georgia), accessed November 14, 2026
- Curing and Smoking: Pork Ham National Center for Home Food Preservation (University of Georgia), accessed November 14, 2026
- Refrigerator Thermometers: Cold Facts about Food Safety U.S. Food and Drug Administration (FDA), accessed November 14, 2026
- Food Safety and Raw Milk U.S. Food and Drug Administration (FDA), accessed November 14, 2026
- Botulism MedlinePlus (U.S. National Library of Medicine, NIH), accessed November 14, 2026
How this guide was made
This guide was drafted with AI writing tools, working from common Amish practice and the sources listed on this page. A separate fact-checking pass opened every cited source and checked each number, threshold and instruction against it; anything a source did not support was rewritten or removed. This page was reviewed by Marcus L. Barber on November 15, 2026. The photo is a licensed stock photo from Pexels (credit under the photo). It is not a photo of Marcus's home.
Amish practice varies by church district, and no Amish community or person has endorsed this guide or any product mentioned on this site.
This page has not been reviewed by a licensed electrician or food-safety professional. See our editorial standards. Spot an error? Email partners@digitalsolomon.com.